Have you ever had too many adult socks and not enough baby hats? Well, here is a solution for your sock surplus: turn them into cute little hats for your baby! This project is simple and quick, perfect for when you need a last-minute baby shower gift. Furthermore, it upcycles those extra socks that are taking up space in your drawer. Keep reading to learn how to make a Baby Sock Hat!
Advantages of Using Adult Socks for Baby Hat
Adult socks are designed with a stretchy rib-knit at the top, making them particularly suitable for crafting little beanies (I elaborate more about different types of knits in this post about wool diaper covers). In this tutorial, we will cut out the heel and the portion of the bottom of the sock next to it; these areas typically receive more wear. However, we'll hold onto that precious rib-knit band, which will prevent your hat from slipping off your little one's head easily, keeping them warm and cozy!
Typically, adult socks are easier to find and cheaper than baby socks, and they have a greater variety. Whether you are buying new socks or looking through your sock drawer, they come in a greater range of colors, materials, and thicknesses. This is why making your own sock-hats provides more options than buying dedicated baby hats.
Gather Supplies
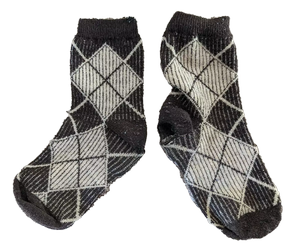
If you're looking to get a head start on this project, there are a few key supplies you'll need to gather together. First and foremost, you'll need a pair of socks—preferably old and with holes, but the holes are not essential. For this tutorial, I'm using a serger, but you can also use a sewing machine or even needle and thread. Finally, although not necessary, something to keep fabric pieces together while sewing can be very helpful. I love using wash-away double-sided tape as it both holds everything together perfectly and prevents the fabric from stretching while I sew. Sewing pins, clips, or free motion sewing could also work for this simple project.
Constructing the Hat Step-by-Step
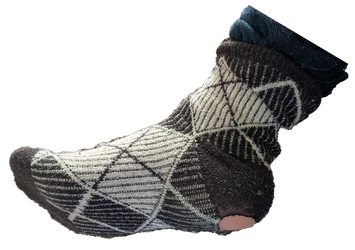
I chose to use the pair of socks I had worn so much that they were no longer wearable. Here is one of them; as you can see, there is an enormous hole with some degraded material around it. Evidently, this sock has seen better days.
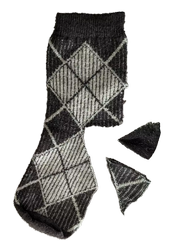
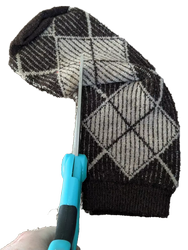
For this project, you will need to remove the heel and a portion of the bottom of the sock near it. Not only will this give us the correct shape for the hat, but these areas are also most likely to be worn out (as my socks were), so it makes sense to remove them before upcycling the sock into a hat. Doing this will ensure that your finished hat is as durable and comfortable as possible because you will utilize the best parts of the socks.
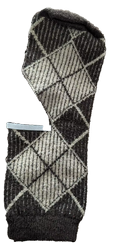
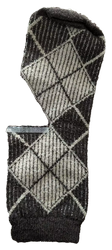
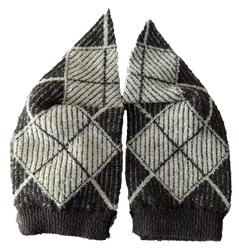
We now cut in a straight line the part that used to be the line going at the bottom of the sock, and is going to be the part connecting both socks into one hat. In the picture, I lay the socks together in a shape similar to the final result. Note that right now, the top part of the hat (or the toe part of the sock) has multiple layers stacked on top of one another that we will remove in later steps because they are not needed.
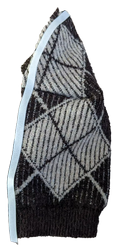
We now make the previous step permanent: we apply double-sided washaway tape, peel off the paper, and fold our sock with right sides together to stick both edges of its opening onto the tape. Then, using either a serger or zigzag stitch on a sewing machine, we sew them together.
To finish off the socks seamlessly, we need to cut away any overlap between them. All you need is a pair of scissors and this can be done quickly and easily as demonstrated in the images below.
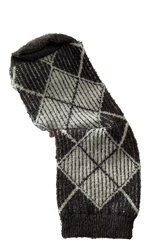
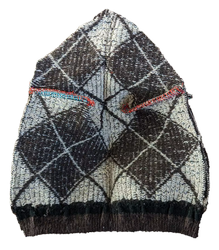
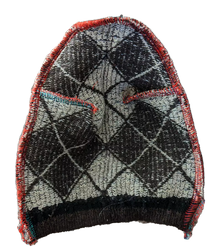
Now, we attach the two socks together to form one hat. Applying double-sided tape to the raw edge on the right side of each single sock, we adhere both pieces and stitch them together with either a serger or the zigzag stitch of a sewing machine; this ensures optimal stretchability for our new creation! In the images provided, you can see this process step by step as I made it: first one half of the hat with double-sided tape applied to it, then the hat held together by glue, and finally, the hat, still inside out, sewn together.
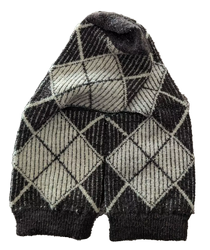
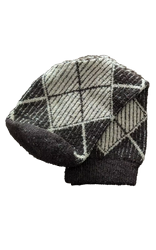
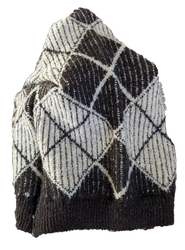
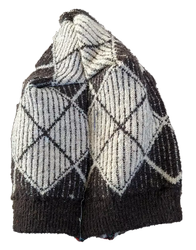
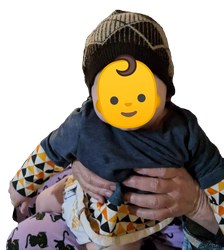
Here is the final hat. Don't forget to wash it before wearing! This is especially important if you used double-sided wash away tape in creating your hat, as the adhesive will limit its stretch. Simply toss the taped hat into your washing machine and watch it dissolve – then enjoy a perfectly fitting cap with no compromise of comfort or fit.
Stylish Variations of the Hat
If you have a few mismatched socks lying around, why not use them to create an original hat? It's easy and fun! Get creative and decorate your hat however you wish! You can express yourself with pom-poms, feathers, embroidery, or applique—the options are endless. With just a bit of imagination and some craft supplies on hand, ordinary hats can become something extraordinary in no time!
Conclusion
Making your own baby hat is a fun and easy project that only requires a few supplies and can be completed quickly. For some reason, out of all the hats we have (and we have bought lots of them), this one is by far the best at not getting into babies' eyes. The process is straightforward—just cut the socks to fit, sew them together, and voilà! You have a one-of-a-kind baby hat that was made with love. If you're looking for more creative projects like this one, be sure to subscribe to my email list for new ideas delivered straight to your inbox.
If you like this post, you might also like my tutorial where I upcycle an adult T-shirt into a baby shirt.

