Sewing an insert into a fitted cloth diaper is not only easy to do but also incredibly helpful for simplifying the laundry process. With this method, you don't have to worry about assembling different pieces together each time you do laundry; you can instead wash the entire thing in one go! It makes it easier for other caregivers as well; they'll be able to help with both putting on night diapers before bed and putting away laundry without any confusion.
Fitted diapers are modern cloth diapers that do not have a waterproof layer. They usually have snaps or velcro, making them easy to put on a baby without using any additional pins. Because the entire diaper is made out of absorbent materials, fitted diapers are already quite absorbent; however, adding extra absorbency and a stay-dry liner during nighttime can be beneficial if you do not want to wake your baby in the middle of the night to change a diaper. In this tutorial, I am using the Essembly fitted diapers paired with the Essembly overnighters because this is what we are successfully using.
If you are familiar with my other posts on cloth diapers, then you might know that I strongly suggest sewing everything together at once instead of having to piece them each time during laundry. Not only does it make laundry easier for you, but it also enables other people to help you. For fitted diapers, it is easier to change baby's diaper when they're twisting in all directions while not having to worry about the insert being aligned correctly. Even my mom can put the night diaper on baby since I have sewn the inserts down.
Even though I did not have trouble with any of these, I want to mention some possible cons of sewing diapers that you might experience. Drying time will be longer; however, with my washing routine, it was not an issue, and these diapers are always dry when it is time to take them off the drying rack. Additionally, poos may get stuck between the diaper and insert after stitching it down, which could make clean-up a bit more challenging. Thankfully, I never had to worry about this since my child does not poop at night.
Step by Step Instructions
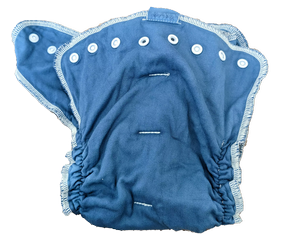
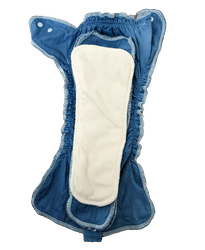
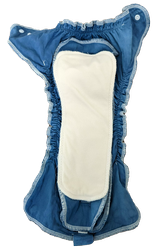
To begin this tutorial, we'll be using an Essembly-fitted diaper that I dyed blue. I have an entire post about why and how I did it, but as a short explanation, I dyed it blue to make it easier to find the night diapers in the laundry. To avoid having to find boosters in the laundry as well, I permanently sew them into the night diapers. A bonus for dyeing the diaper blue is that the photos in this tutorial are more legible with a white booster on a blue diaper compared to if I were taking photos of white on white.
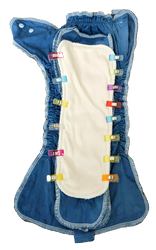
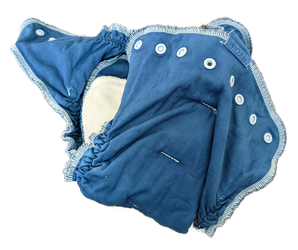
Before sewing the booster, I lay it on top of the diaper and use sewing clips to secure it in place. I find that sewing clips and glue are much easier to use with the thick, absorbent fabrics used in diapers compared to sewing pins that are hard to push through the fabric.
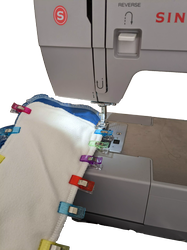
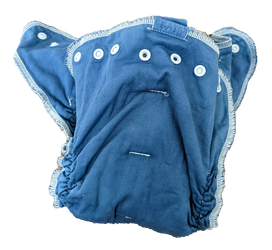
I then sew two parallel stitches on the sides of the booster. I use a zig-zag stitch on my sewing machine, because I find that it prevents the edges of the two fabrics from separating from each other and creating unnecessary bulk. Additionally, I do not add any stitches in the middle to allow for maximum ventilation and airflow for reasonable drying time after laundry.
After two weeks of using these diapers, I'm more than satisfied with the results! Not only are they always dry when I come to take the other diapers off the drying rack, but they also make changing my baby before night time so much easier. Matching diaper pieces after doing laundry is a thing of the past. These diapers, along with the other diapers I sewn into one piece, have truly made life so much simpler for me!

